
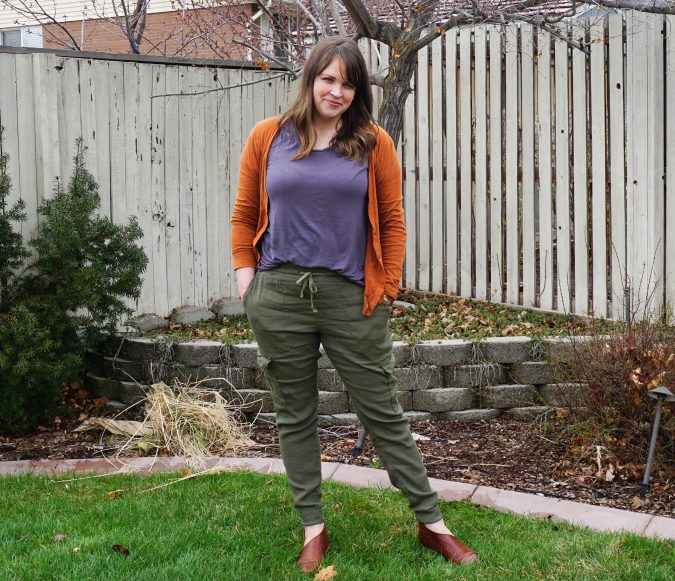
If you’re anything like me, this tutorial is going to make you audibly gasp and then rush to buy fabric so you can copy it immediately! Emily used the Bryce Cargo Pants to make elastic waisted joggers in both woven AND knit!!! This girl is on fire. I might just steal that linen pair from her closet in the dead of night. And those shoes too. And then delete this post so there’s no proof.
~~~~~~~~~~~
Hey, my Hey June friends! This post is a long time coming. Man, it took me way to long to get my act together to get these pants finished, pictures taken, and this tutorial written. Sheesh, I could never be a blogger.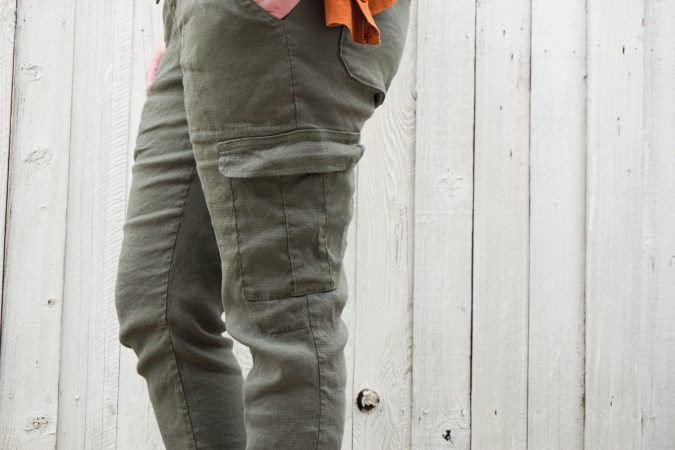
I actually had a vision of elastic waisted Bryces during testing. I was 10 months postpartum and wanted to make the pants reeeaaalllly badly but I knew my waistline was still changing (having my 5th child has done a number on my body). I hated thinking I would be taking time to make a perfectly fitted pant with zip fly and it wouldn’t fit me a couple months down the road (granted, it has been more than a couple months since and they still fit me. My waistline ain’t ever coming back.) I was tempted to just faux fly it and throw on a tummy control panel, or yoga waistband or something. A major change like that during a pattern test would be a big no-no so I filed the idea away in the noggin and figured I’d try out the hack later on. My idea morphed a little since then and instead of just adding a knit waistband I had a new vision of Bryce Cargo JOGGERS! Two different versions came to mind and so naturally I HAD to make both.
Let’s get to it. First up.
Supplies needed:
Bryce Cargo Pants pattern -minus the waistband pieces, fly shield, belt loop piece, and interfacing pieces. (you could still interface your pocket flaps with a light weight tricot interfacing if you’d like. I did not.)
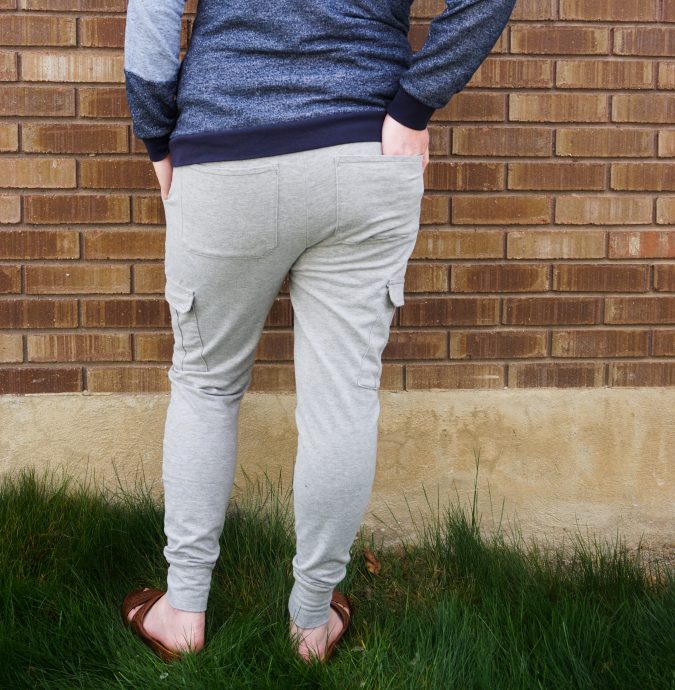
2.5 yards of a stretch linen or French terry (my versions- stretch linen is from Fabric Mart and the french terry is from Raspberry Creek Fabrics.)
Grommets (optional)
Twill tape or some type of cording (optional)
All other sewing supply essentials.
Stretch linen version: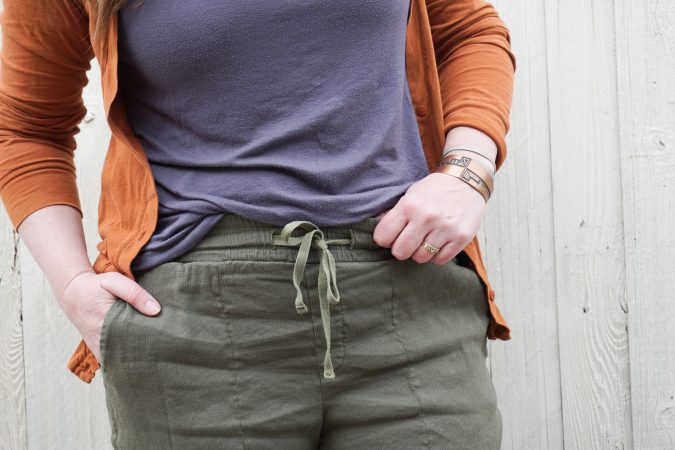
- I sewed them as is per instructions 1-16
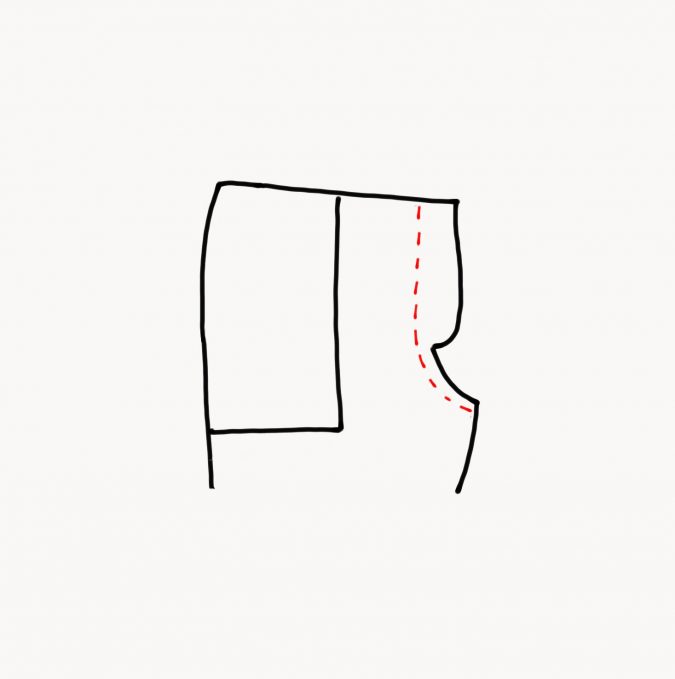
- Sew the faux fly.
- Take your two front pant pieces and you can either finish the edges now or after you sew them together. Put them right side together and sew down the center front seam continuing down the crotch seam.
- Fold fly over to the side and pin. (you can baste it down at this point, if you’d prefer. Or you can just wing it like I did)
- Topstitch the fly flap down just like in the original instructions step 30 (and 31 if you want the double top stitching)
- Refer back to the original instructions 36-52. Note: I didn’t want closures on my pockets so I skipped those steps. Which is also why I didn’t do the flaps on the butt pockets. I figured they’d be more likely to flip up after washing or sitting so I just left them off. That is personal preference though.
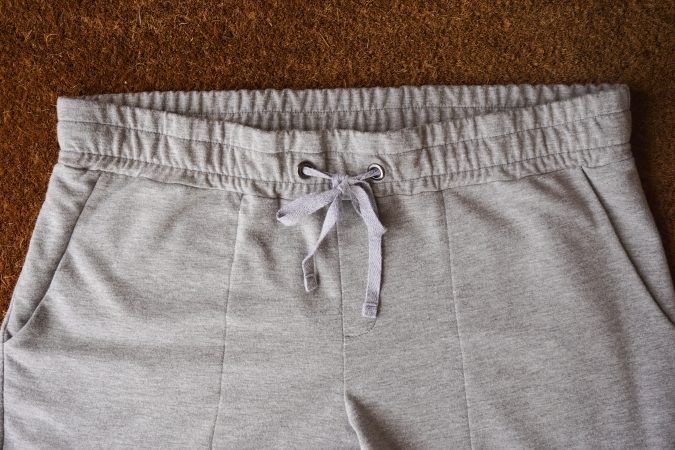
- Make and attach your waistband.
- Length of waistband= top edge of your pants + seam allowance
- Width of waistband= (width of elastic x 2) + seam allowance and some wiggle room for the elastic. Note: I used 2” elastic
- Sew your two short ends right sides together. Fold wrong sides together and iron.
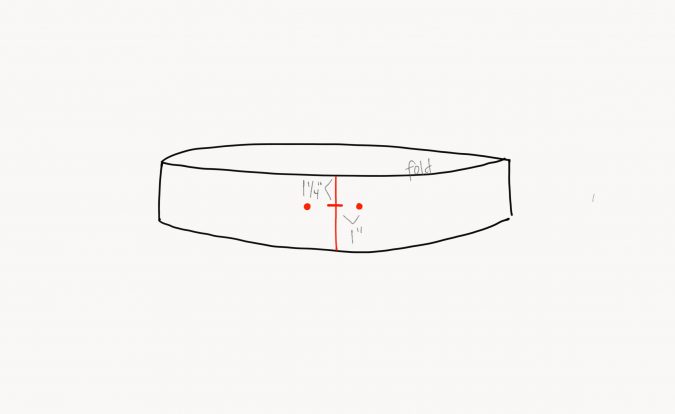
- If adding buttonholes/grommets for a drawstring:
-
- Mark center front. Since I’m using 2” elastic about 1 ¼” down from the top of the fold will be close to the center line of where I’ll want my button hole/grommets. Mark 1 inch out on both sides of the center front on that center line.
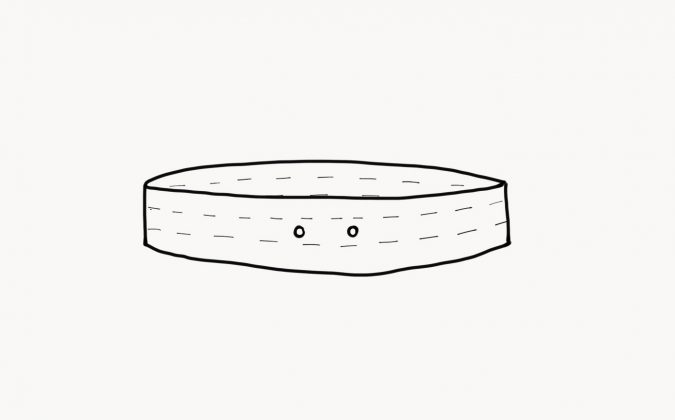
- Unfold waistband and add some interfacing behind your markings to stabilize button holes/grommets. Sew button holes/attach grommets.
-
- Refold waistband and divide into 4 equal sections and line up with the side seams, back, and front seams right sides together. Making sure your buttonhole/grommets are at the front. Attach leaving an opening to thread your elastic through.
- Cut a piece of elastic to your desired length for your waist. I just wrap it around myself and get it to how taut I like it then add a bit for it to overlap so you can sew it together.
- Thread elastic through the waistband, overlap ends and sew together, sew up hole.
- Stitch your drawstring casing. Distribute the gathering evenly around your waistband and pin in place. Stitch two lines, one slightly above the other slightly below the buttonholes (or grommets). Pull the elastic in front of your presser foot to flatten out the gathers as you sew.
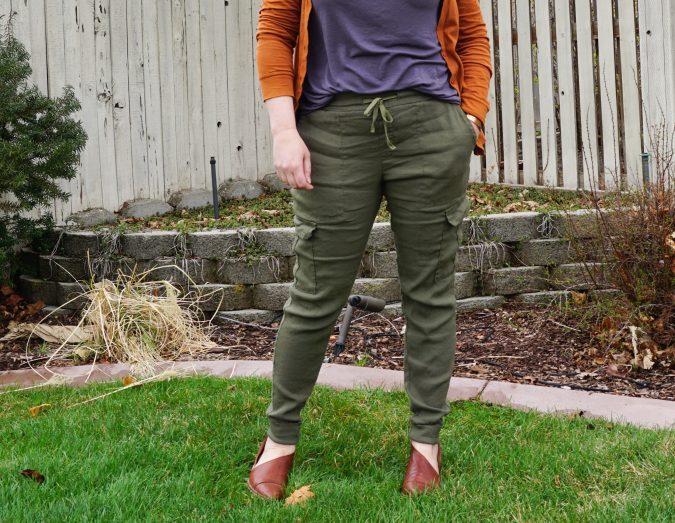
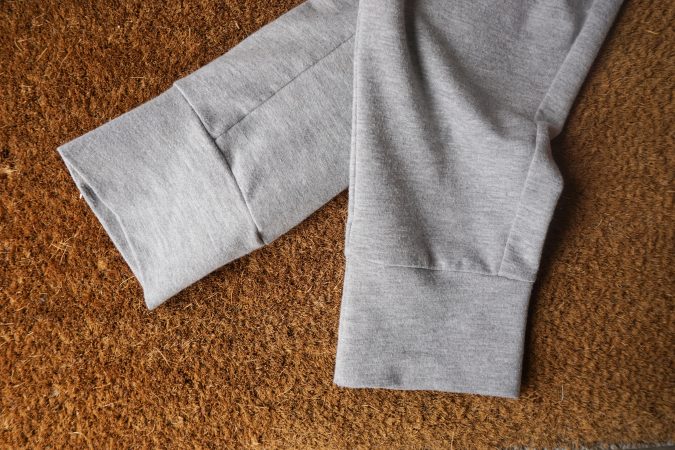
- Make and attach cuffs
- Length of cuff= bottom leg opening x .9
- Height of cuff= (desired height x 2) + seam allowance. Note: my cuff was made to be about 3 ½”. Thick enough to fold it up like I did on the green pair.
- Sew two short ends right side together. Fold wrong sides together and iron.
- Divide band and bottom of pant leg into four equal parts and line them up right sides together. Sew.
Alternatively: hem the bottom or do an elastic casing.
- Thread your twill tape or cording through buttonholes (or grommets). Cut to desired length. Hem, knot ends, or however you want to finish the edges.
Do a little happy dance. You are done!!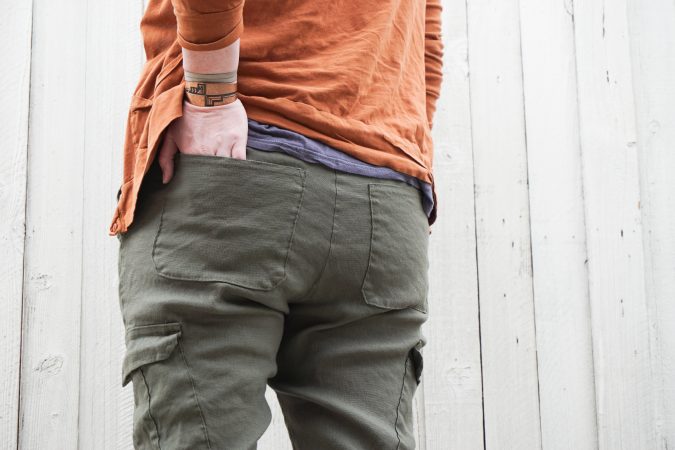
French Terry knit version: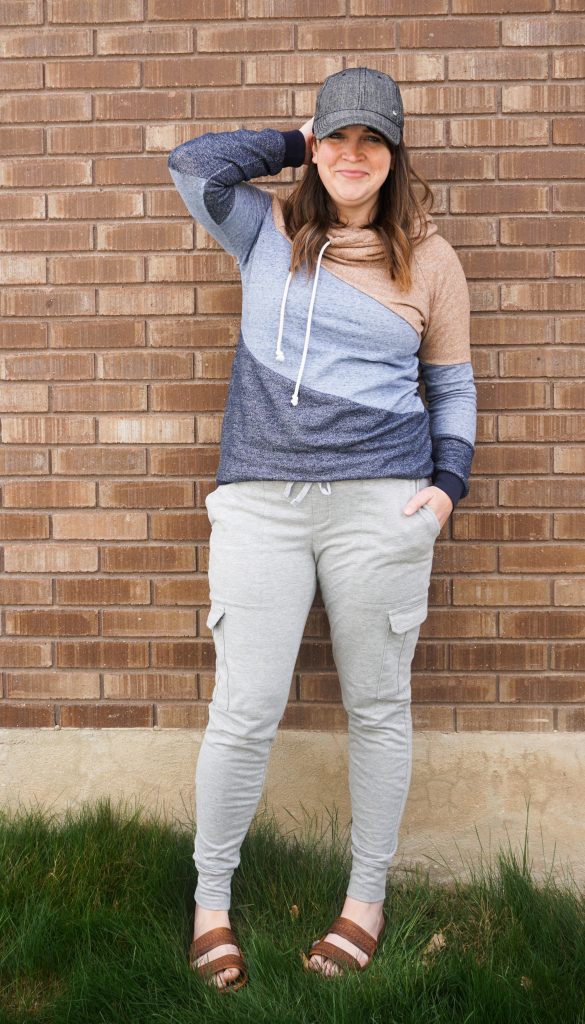
This one took a couple additional mods.
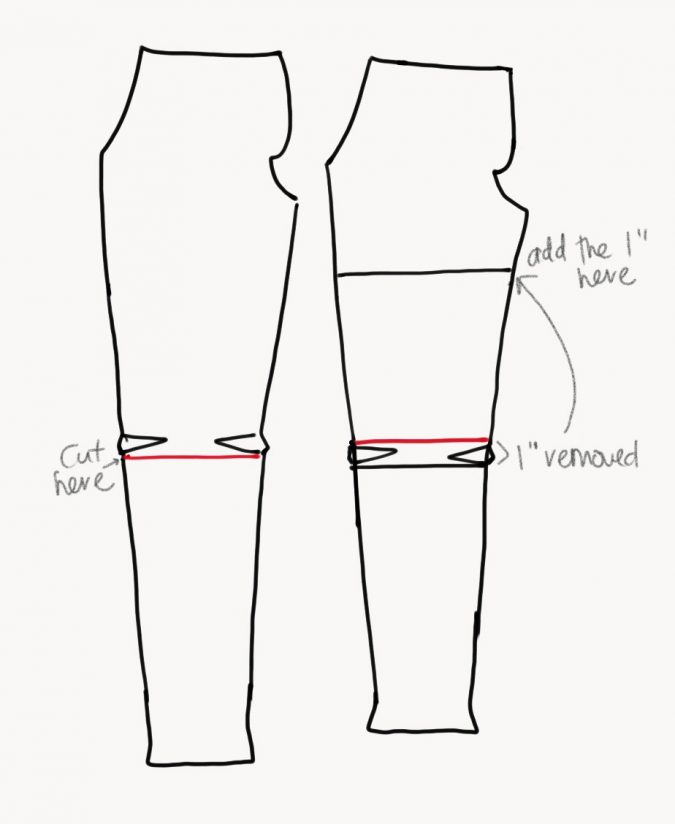
- I removed the knee dart. To do that I cut the pattern below the darts and tape it above the darts. Then add the length removed from the dart back to the pants at the lengthen/shorten line between the hips and knee.
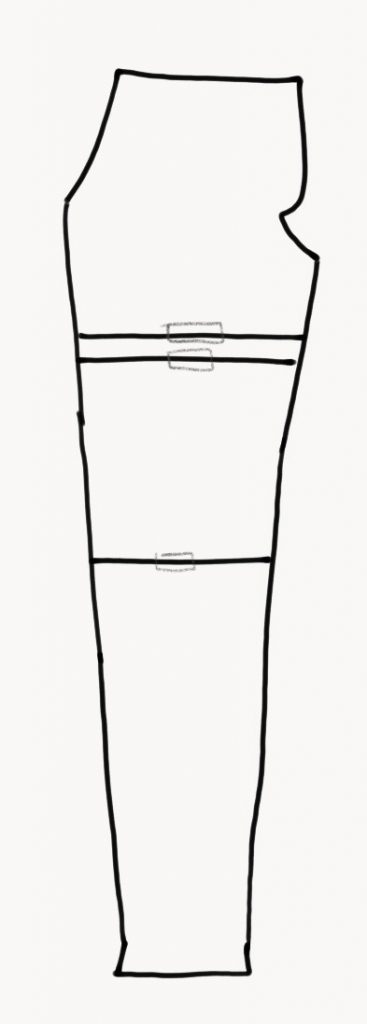
- I just ignored the waist dart. I didn’t remove it. I just cut the top of the pants as if it wasn’t there.
- I sewed them up as per instructions above except the bottom of the slash pocket. I skipped step 9 and just serged (or sewed) the bottom of the pocket closed right sides together (step 10). I didn’t want additional bulk with multiple layers of french terry by doing the clean finish.
The rest was done the same as above except for using grommets instead of button holes.
I’m telling you these two pairs have been in constant rotation. They are so comfy and easy to wear. I am no tutorial writing pro and my drawings are pretty sad so let me know if you have any questions. You can find me on Instagram at Enjoyful_makes.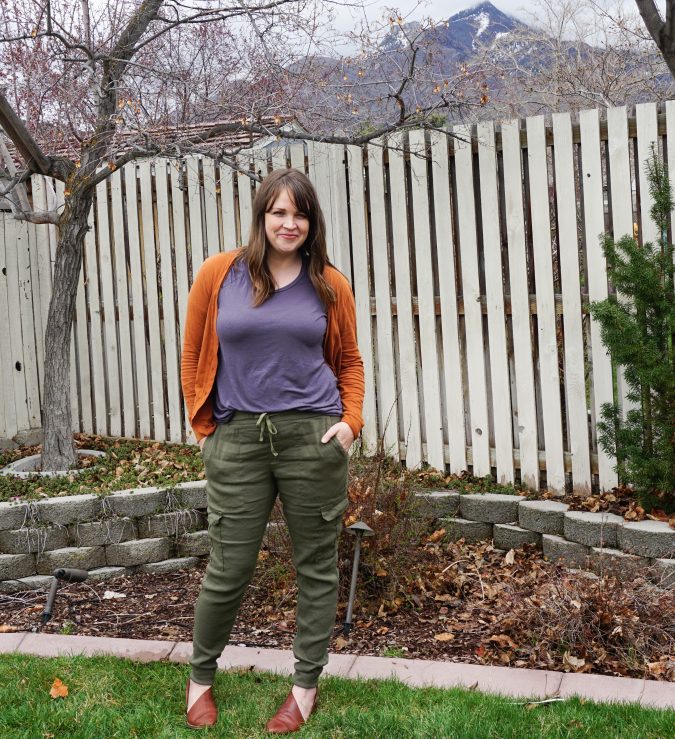
Thanks for having me, Adrianna (and for your patience)!
Happy hacking!
~~~~~~~~~~
WHAT DID I TELL YOU!?! Are they not AMAZING!? I’m obviously fangirling hard over here. I love everything Emily does, but these pants….I want to marry them. Thank you SO much for bringing these into the world and teaching us how to make them, Em!
But how is Emily always so brilliant though! Loving these hacks and can’t wait to try them out
I know, right? She’s the best!!!
Awe Abbey! You are far too kind! I can’t wait to see yours!
Okay this is amazing. Thank you for this post. Now cutting to the chase: where. is. your. blog. I went to Instagram and followed you immediately at enjoyful makes but I can’t find a blog. Please tell me there is a blog, too. If you don’t have one, could you just keep guest blogging at Hey June Handmade. (Which already was one of my favourite blogs!) Okay I’ll turn down the volume. Seriously, I really enjoyed reading your guest post. Love to see your makes! Very inspirational.
Wow! You are the sweetest! I’m glad you like my makes but me a blogger…. paaassssss. This post just about did me in. haha. I’m not cut out for many words…hence the reason I love Instagram. I’m afraid occasional guest posting is all you’ll see from this lady. It is nice to know that if I did have a blog I’d have at least one reader ;). Thank you!!
Awesome! I can’t wait to try these! Would it work in a stretch twill as well?
It definitely would, just wouldn’t have the same drape/slouchiness that you see here. It would basically look like the regular Bryces with an elasticated waistband.
Yay!! Let me know if you have any questions! Excited to see them!
1. I need those pants.
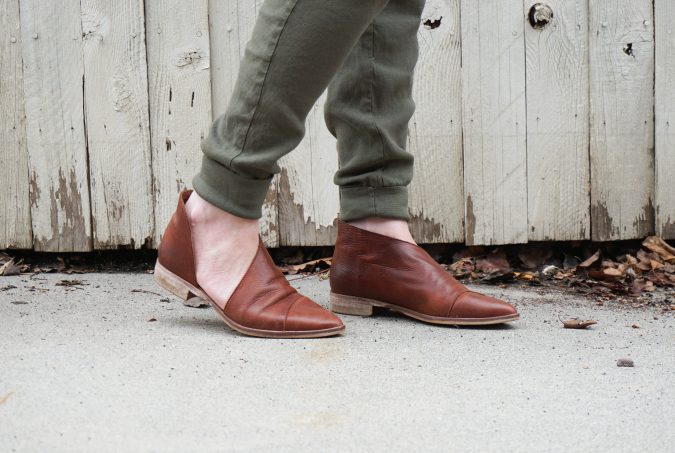
2. I need her shoes from the linen pair.
3. I need her sweatshirt from the french terry pair.
So basically I need to be her…
I’m totally with you on this. Can you believe she thrifted those shoes?!?! best find ever! Her sweatshirt is also a tutorial here if you search under the tutorials tab or type in “lane” in the blog search menu!
1. Make some!! They were easy peasy!
2. over my dead body. 😉
3. Make that too!!
bahaha.
I’m with everyone here (and 5 years too late!)
1) Congrats on 5 kiddos! God only blessed us with 1, and even though I’m 39 and was 35 when I finally decided on kids, we’re still not giving up entirely. At least I had my dream birth at home, which I can’t recommend enough to future mamas out there. Our bodies were built for this!
2) What brand are the shoes with the linen pair? Perhaps I can find the shoe 😉
3) Did you use ribbing or a knit for the cuff of the linen pair?
4) Did you size down for the knit pair?
5) AMAZING JOB on these ADORABLE joggers!! You’re so stinkin adorable, and if I’m ever lurking on my IG, I’ll follow you.
MOST IMPORTANTLY: My name is Jenny Sandoval and I’ve no idea why it says my husband’s name. Alas, I’m not a man trolling sewing sites XD
1. Awww… glad you got your home birth dream.
2. They are Free People. They seem to be all over the place so I’m sure they aren’t hard to find.
3. No I just cuffed them with the same fabric. They are a treat to get over my foot. haha. A ribbing or knit would be ideal. Or at least make it not as fitted as I did. lol. You could also just fold the pant leg up and cuff them that way instead of sewing on an actual cuff.
4. I did not size down. I just used my regular size.
5. Ha! Thanks Jenny (not to be confused with Tim. lol). I’ve been a slacker in sewing land so not much going on over on my insta. Someday I’ll get back to it!!
Thanks for your comment!